Fixing air ducts involves identifying airflow problems inside your HVAC duct system and applying the correct repair solution to restore proper performance. This can include sealing air leaks, reconnecting loose duct sections, repairing damaged areas, or improving insulation where energy loss occurs. When air ducts are not working properly, homeowners often experience uneven room temperatures, rising energy bills, and excessive dust buildup. These symptoms usually indicate hidden issues within the ductwork that are easy to overlook. The guide below explains how to fix air ducts step by step and helps you determine when professional air duct repair is the smarter and safer choice.
1. Identify the Root Cause of Air Duct Problems
Before you start any DIY repair, confirm what is actually causing the airflow issue. Many homeowners waste time sealing random seams, when the real problem is a disconnected run, crushed ductwork, or poor insulation that keeps bleeding energy into the attic or crawl space.
A quick check begins with your symptoms. If one room is always hotter or colder, the issue is often a disconnected, sagging, or undersized duct line feeding that area. If your energy bills are climbing while comfort stays the same, widespread leakage or missing insulation is more likely. If you notice excessive dust, whistling sounds, or weak airflow at multiple vents, you may be dealing with leaks, restrictions, or pressure imbalance.
1.1. Common air duct problems and what they usually mean
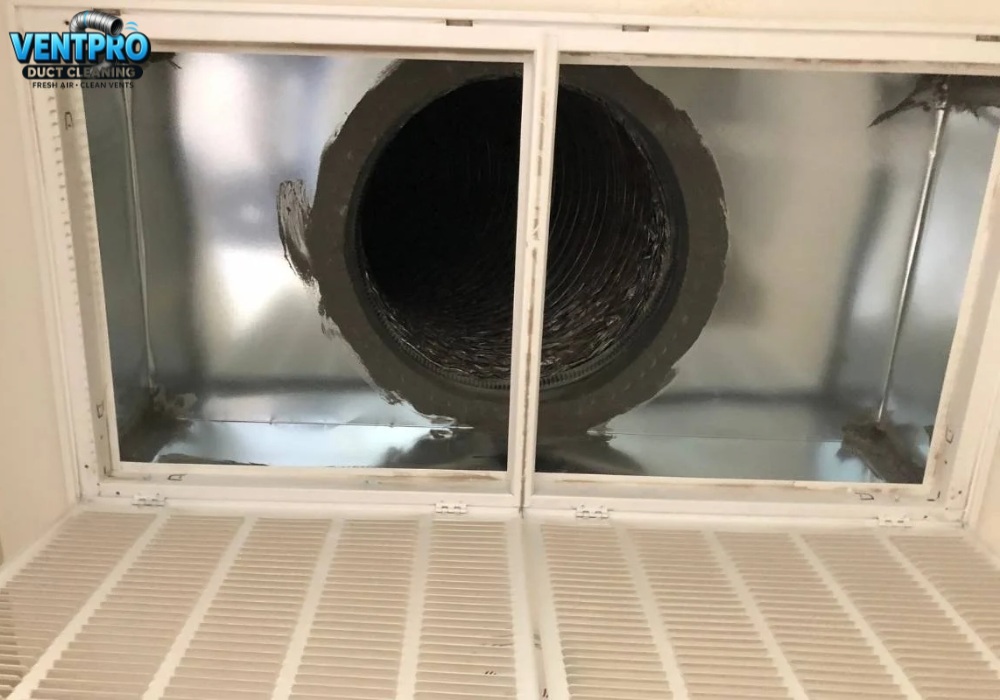
- Air leaks at joints, seams, or connections: This is the most common cause of lost airflow and efficiency. Leaks typically happen at transitions, elbow joints, plenums, and areas where flexible duct connects to metal collars. Dust streaks around seams are a strong clue.
- Disconnected or sagging duct sections: In attics and crawl spaces, flexible duct can separate from a collar, or sag between supports and create airflow resistance. A sagging run can reduce airflow even if there are no leaks.
- Holes, tears, crushed, or deteriorated ductwork: Punctures may come from rodents, foot traffic in attics, or aging materials. Crushed ductwork restricts airflow and often causes temperature imbalance and noisy operation. If the duct liner is falling apart, patching is usually temporary.
- Poor or missing insulation: Ducts in unconditioned areas need insulation to prevent energy loss and condensation risk. Missing or damaged insulation often shows up as weak cooling in summer, warm air loss in winter, or moisture issues around ducts.
- Blocked or imbalanced airflow: Restrictions can come from clogged filters, closed or blocked supply vents, dirty blower components, crushed flex duct, or dampers set incorrectly. Imbalance often shows as strong airflow in some rooms and weak airflow in others.
1.2. How to diagnose your duct issue with a simple checklist
Use this quick approach before you repair anything.
1 – Run the HVAC fan (set thermostat to “Fan On”) so you can test airflow steadily
2 – Check the easiest failure points first
- Supply vents blocked by furnitur
- Dirty HVAC filter
- Closed dampers if accessible
3 – Compare airflow room by room
- Weak airflow in one room often points to a localized duct issue
- Weak airflow across many rooms often points to leaks, restrictions, or system pressure problems
4 – Inspect accessible ductwork (attic, garage, crawl space, basement)
- Look for disconnected sections, sharp bends, kinks, or sagging run
- Look for dust trails at joints, which commonly indicate leaks
5 – Listen and look for warning signs
- Whistling near vents can signal leakage or high static pressure
- Musty smell can signal moisture or microbial growth risk, especially in crawl spaces
Once you know which issue you’re dealing with, the repair becomes much simpler and more reliable. Next, we’ll walk through how to fix air ducts step by step, organized by the exact problem you found so you can choose the right method the first time.
2. How to Fix Air Ducts Step by Step (Based on the Problem)
Effective air duct repair starts with matching the repair method to the exact issue you identified. Applying the wrong fix often leads to recurring airflow problems, wasted materials, and higher long term costs. The sections below explain how to fix air ducts correctly based on the most common failure types found in residential HVAC systems.
2.1. How to Fix Leaky Air Ducts (Most Common Issue)
Air leaks are one of the biggest causes of comfort loss and high energy bills. In many homes, leaking ductwork can waste up to 20 to 30 percent of conditioned air before it ever reaches the living space.
Step 1: Turn on the HVAC fan
Set the thermostat to “Fan On” so air flows continuously through the duct system. This makes leaks easier to detect.
Step 2: Locate the leak points
Carefully feel around duct joints, seams, elbows, and connections for escaping air. At the same time, look for dust streaks or dark residue around seams, which often indicate long term air leakage.
Step 3: Clean the repair area
Wipe the surface thoroughly to remove dust, grease, and debris. Sealants will not bond properly to dirty duct surfaces, so this step is essential.
Step 4: Apply mastic sealant
Use a brush or gloved hand to apply mastic sealant directly over the seam or joint. Cover the entire leak area and extend slightly beyond it to ensure a complete seal. Mastic is preferred because it remains flexible under temperature changes.
Step 5: Reinforce if necessary
After the mastic begins to set, apply UL listed aluminum foil tape over the sealed joint if extra reinforcement is needed. Press firmly to ensure proper adhesion.
Important warning: Do not use cloth duct tape. It dries out under heat and pressure and often fails quickly, allowing leaks to return.
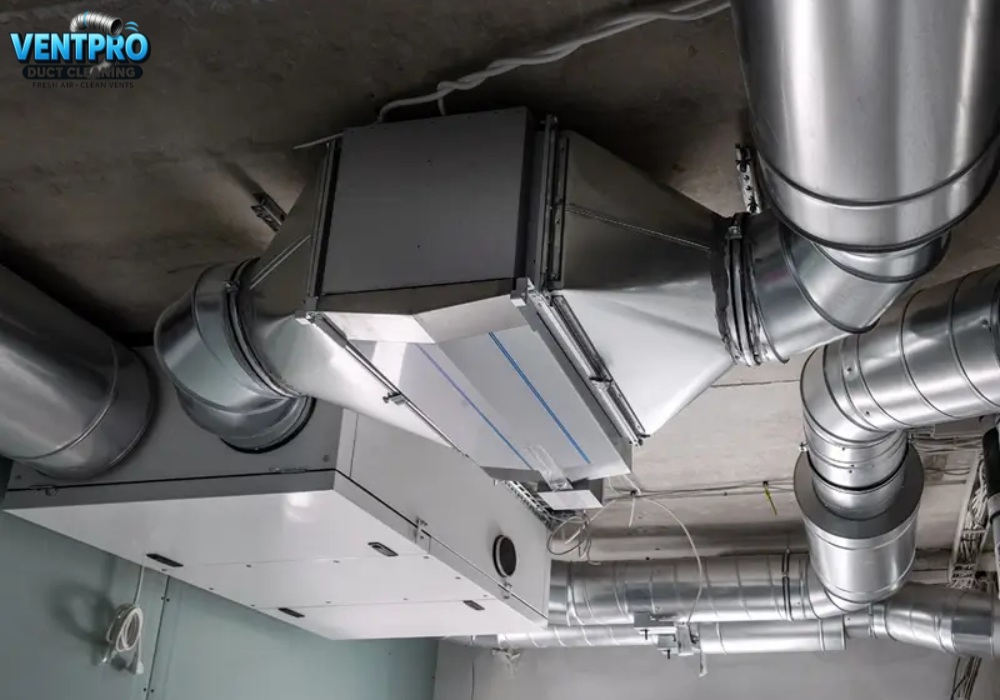
2.2. How to Reconnect Disconnected or Loose Ductwork
Disconnected or loose duct sections are common in attics, crawl spaces, and older homes. When this happens, large amounts of air are lost instantly.
Step 1: Realign the duct sections
Bring the separated duct sections back into proper alignment so they sit straight and flush without sharp bends.
Step 2: Secure the connection mechanically
Fasten the connection using sheet metal screws for rigid ducts or approved duct clamps for flexible ductwork. Mechanical fastening is required for long term stability.
Step 3: Seal the joint completely
Apply mastic sealant around the entire connection to prevent future air leakage.
Step 4: Add insulation if required
If the duct is located in an unconditioned area such as an attic or crawl space, insulate the repaired section after the sealant has cured.
When done correctly, this repair often restores airflow immediately.
2.3. How to Repair Holes or Damaged Duct Sections
The correct repair method depends on the size of the damage and the condition of the duct material.
Step by step repair for small to medium holes
Step 1: Inspect the surrounding duct material
Confirm that the duct is structurally sound around the damaged area. If the material is brittle or collapsing, replacement may be required.
Step 2: Apply a duct patch
Place a sheet metal duct patch or fiberglass mesh over the hole, fully covering the damaged area.
Step 3: Seal the patch with mastic
Apply mastic sealant generously over the patch and along all edges. Ensure there are no gaps where air can escape.
When replacement is the better option
If the duct is crushed, severely deteriorated, or collapsing internally, temporary patching often restricts airflow further. In these cases, replacement is usually the correct solution. This is a common point where DIY repairs fail.
2.4. How to Fix Air Ducts in Crawl Spaces or Under the House
Crawl space ductwork is exposed to moisture, sagging, and insulation failure, making proper repair especially important.
Step by step crawl space duct repair
Step 1: Re support sagging ducts
Use proper hanger straps to lift and support ducts at regular intervals. This prevents airflow restriction and reduces stress on joints.
Step 2: Seal all joints first
Apply mastic sealant to every accessible joint and connection before adding insulation. Sealing first ensures leaks are not trapped beneath insulation.
Step 3: Insulate with moisture resistant materials
Use insulation designed for crawl space environments to reduce condensation and energy loss.
Step 4: Avoid compressing ducts or insulation
Never force ducts or insulation into tight spaces. Compression restricts airflow and increases static pressure.
Improper crawl space repairs often lead to long term airflow and comfort problems.
2.5. Can an Air Duct Repair Kit Actually Work?
An air duct repair kit can be useful, but only in limited situations.
- When a repair kit can help: Repair kits are suitable for minor leaks, small holes, and short term fixes when the damage is isolated and easy to access.
- What repair kits cannot do: Repair kits cannot correct airflow imbalance, fix collapsed or severely damaged ductwork, or diagnose system wide pressure issues. They also cannot address hidden problems deeper in the duct system.
A repair kit is a tool, not a complete solution. If airflow problems persist after basic repairs, a professional inspection is often necessary.
3. When Should You Stop DIY and Call an Air Duct Professional?
DIY air duct repairs can solve minor and visible issues, but they have clear limits. Continuing to patch problems without confirming the root cause often leads to higher costs and long term HVAC damage. You should stop DIY repairs and call a professional when the signs below appear.
Clear signs DIY air duct repair is no longer enough
- Energy bills keep rising after repairs: If your utility costs continue to increase even after sealing joints or patching holes, the problem is likely system wide. This often points to multiple hidden leaks, poor duct design, or pressure imbalance that basic repairs cannot fix.
- Rooms remain hot or cold: Persistent temperature differences usually indicate airflow imbalance, disconnected runs, or undersized ductwork. These issues require airflow measurement and system level correction, not surface sealing.
- Ducts are inaccessible or severely damaged: Ductwork located deep inside walls, tight crawl spaces, or complex attic layouts is difficult to repair safely without proper tools. Crushed, collapsing, or heavily deteriorated ducts also should not be patched, as temporary fixes often restrict airflow further.
- Mold, moisture, or insulation failure is present: Moisture inside or around ductwork increases the risk of microbial growth and insulation breakdown. Sealing ducts without addressing moisture sources can trap humidity and worsen indoor air quality problems.
- You suspect multiple leaks or pressure imbalance: When airflow feels weak across several rooms or vents make whistling noises, the issue is often excessive static pressure or widespread leakage. These problems require diagnostic testing rather than guesswork.
At this stage, a professional inspection prevents wasted money, repeated repairs, and unnecessary strain on your HVAC system.
Why Homeowners Choose VentPro 512
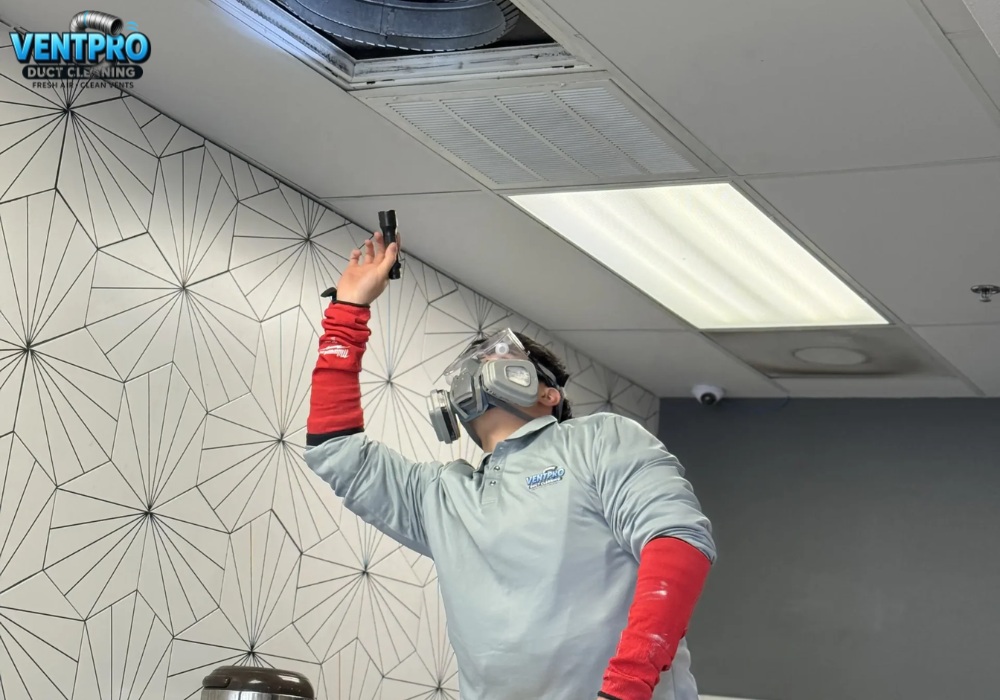
VentPro 512 focuses on diagnostic based air duct repair rather than quick fixes. Instead of sealing random sections, our technicians evaluate the entire duct system to understand how air actually moves through your home.
What professional inspection includes
- Measuring airflow and static pressure
- Inspecting duct integrity, connections, and insulation
- Identifying hidden leaks and structural failures
- Recommending repair or replacement based on long term performance
This approach ensures repairs solve the real problem, not just the visible symptoms. If your duct system needs more than surface level sealing, professional air duct repair is the safest and most cost effective solution. Proper diagnosis protects your comfort, energy efficiency, and indoor air quality for the long run.
4. FAQs About How to Fix Air Ducts
Q1: How Much Does Air Duct Repair Cost?
- DIY air duct repairs: Most homeowners spend about $20 to $100 on mastic sealant, aluminum foil tape, or a basic air duct repair kit. The main risk is missed leaks or incomplete fixes, which often turn into short term solutions that need to be redone.
- Professional air duct repair: Professional service typically ranges from $300 to $1,200, depending on the extent of damage and system complexity. This usually includes inspection, leak sealing, airflow balancing, and performance verification.
The real cost is not the first repair. It is paying to fix the same problem twice.
Q2: Is an Air Duct Repair Kit Worth It?
An air duct repair kit can be worth using when the issue is small, visible, and clearly isolated, such as a minor seam leak or a small puncture.
A repair kit is not effective for system wide airflow problems, pressure imbalance, collapsed ductwork, or hidden leaks. Use kits only when you are confident the issue is limited and accessible.
Q3: How Do I Find Reliable Air Duct Repair Near Me?
Search results alone are not enough to choose the right contractor. Reliable air duct repair companies should:
- Perform full duct inspections, not just visual checks
- Measure airflow and static pressure
- Clearly explain whether repair or replacement is the better option
- Avoid cheap coupon offers that focus on speed instead of accuracy
Local expertise and proper diagnostics matter far more than the lowest price. Homeowners who want long lasting results often choose VentPro 512 for their diagnostic first approach and transparent recommendations.
Learning how to fix air ducts starts with understanding the real problem, not rushing to seal every joint you see. Some issues are safe and effective DIY repairs when handled correctly. Others require professional evaluation to prevent long term HVAC damage and repeated failures.
If basic repairs do not restore comfort or efficiency, expert help is the next step. A properly repaired duct system delivers lower energy bills, cleaner indoor air, and consistent comfort throughout the home, all without guesswork.
|
VENTPRO 512 – FRESH AIR & CLEAN VENT Trusted Experts for Clean Air, Healthy Homes, and Reliable Service in Austin, TX
|